Power Query
If you are an Excel or Power BI user, you can easily fetch data from the NenaAPI directly through Power Query. For Excel we provide four Power Query scripts that will connect Power Query to each of the Nena API endpoints. For Power BI we have a custom connector, availble in the “Get-Data” menu after installation. With Power Query you can quickly create responsive and intricate models directly in Excel or Power BI with our Nena API.
New to Power Query? Read more about Power Query here.
Installation
Below you will find a guide on how to set up the Nena API connection through Power Query for Excel and Power BI.
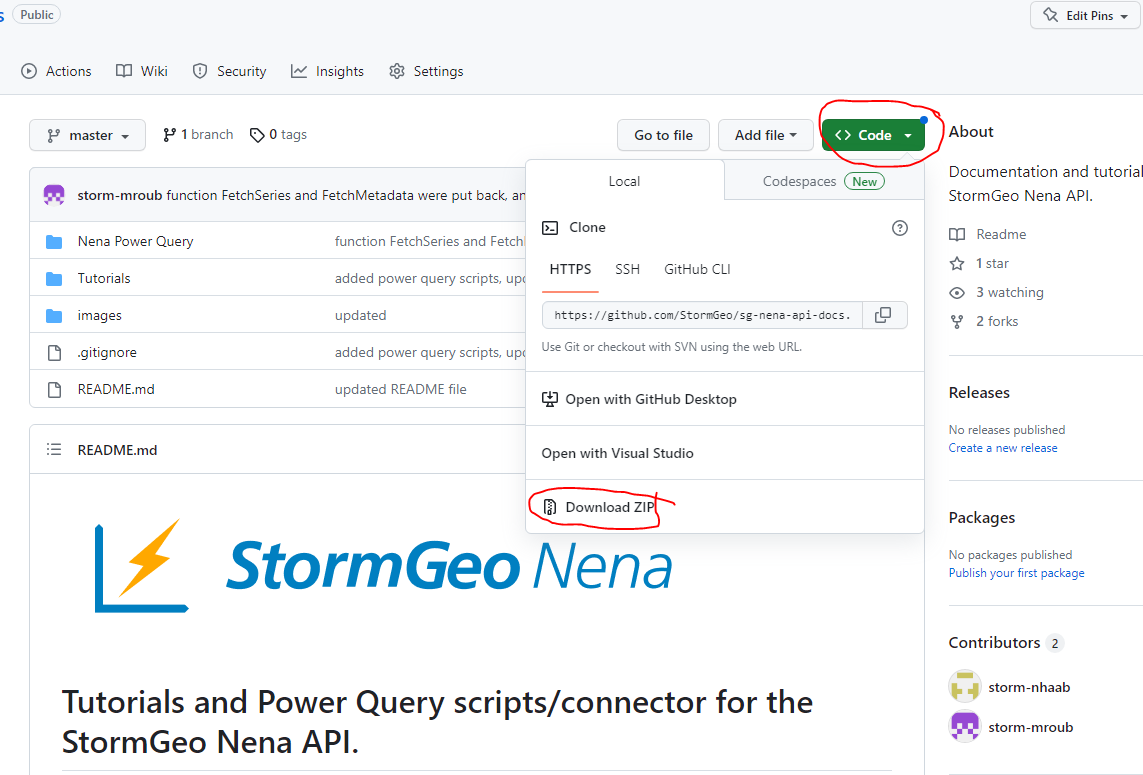
The first step is to download the Power Query scripts folder. Download the folder named “Nena Power Query” from our Github repository. We recommend you put the scripts somewhere meaningful.
On GitHub, click on the green “Code” button and then “Download ZIP” to download the Github repository as a folder to your machine.
Excel
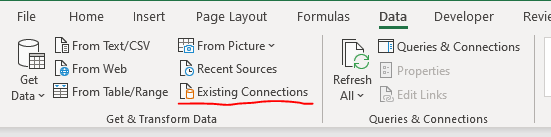
In Excel go to the “Data” pane and click on “Existing Connections”.
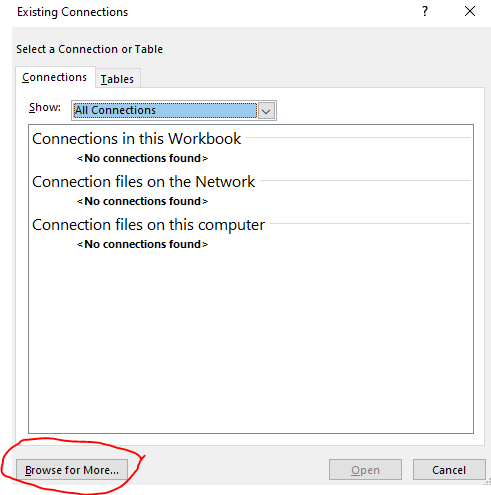
Click on “Browse for More…” and navigate to the “Nena Power Query” and then open the “Excel” folder.
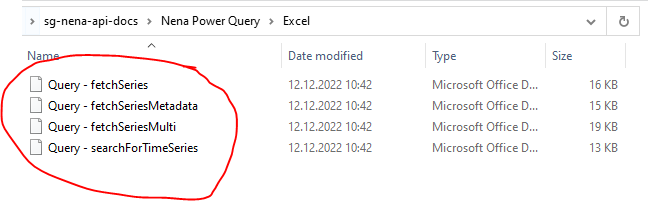
Select one of the files starting with “Query -” in their name. click “Open”.
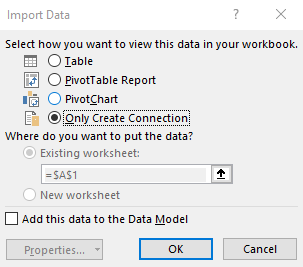
In the Import Data window pop-up, uncheck “Table” and select “Only Create Connection”. Press “OK”.
Repeat the same process with the other three Query files.
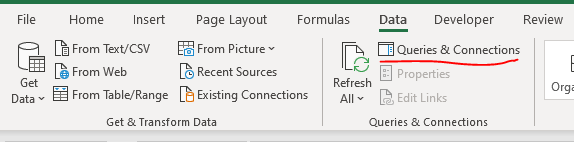
Go to the “Data” pane and select “Queries & Connections”.
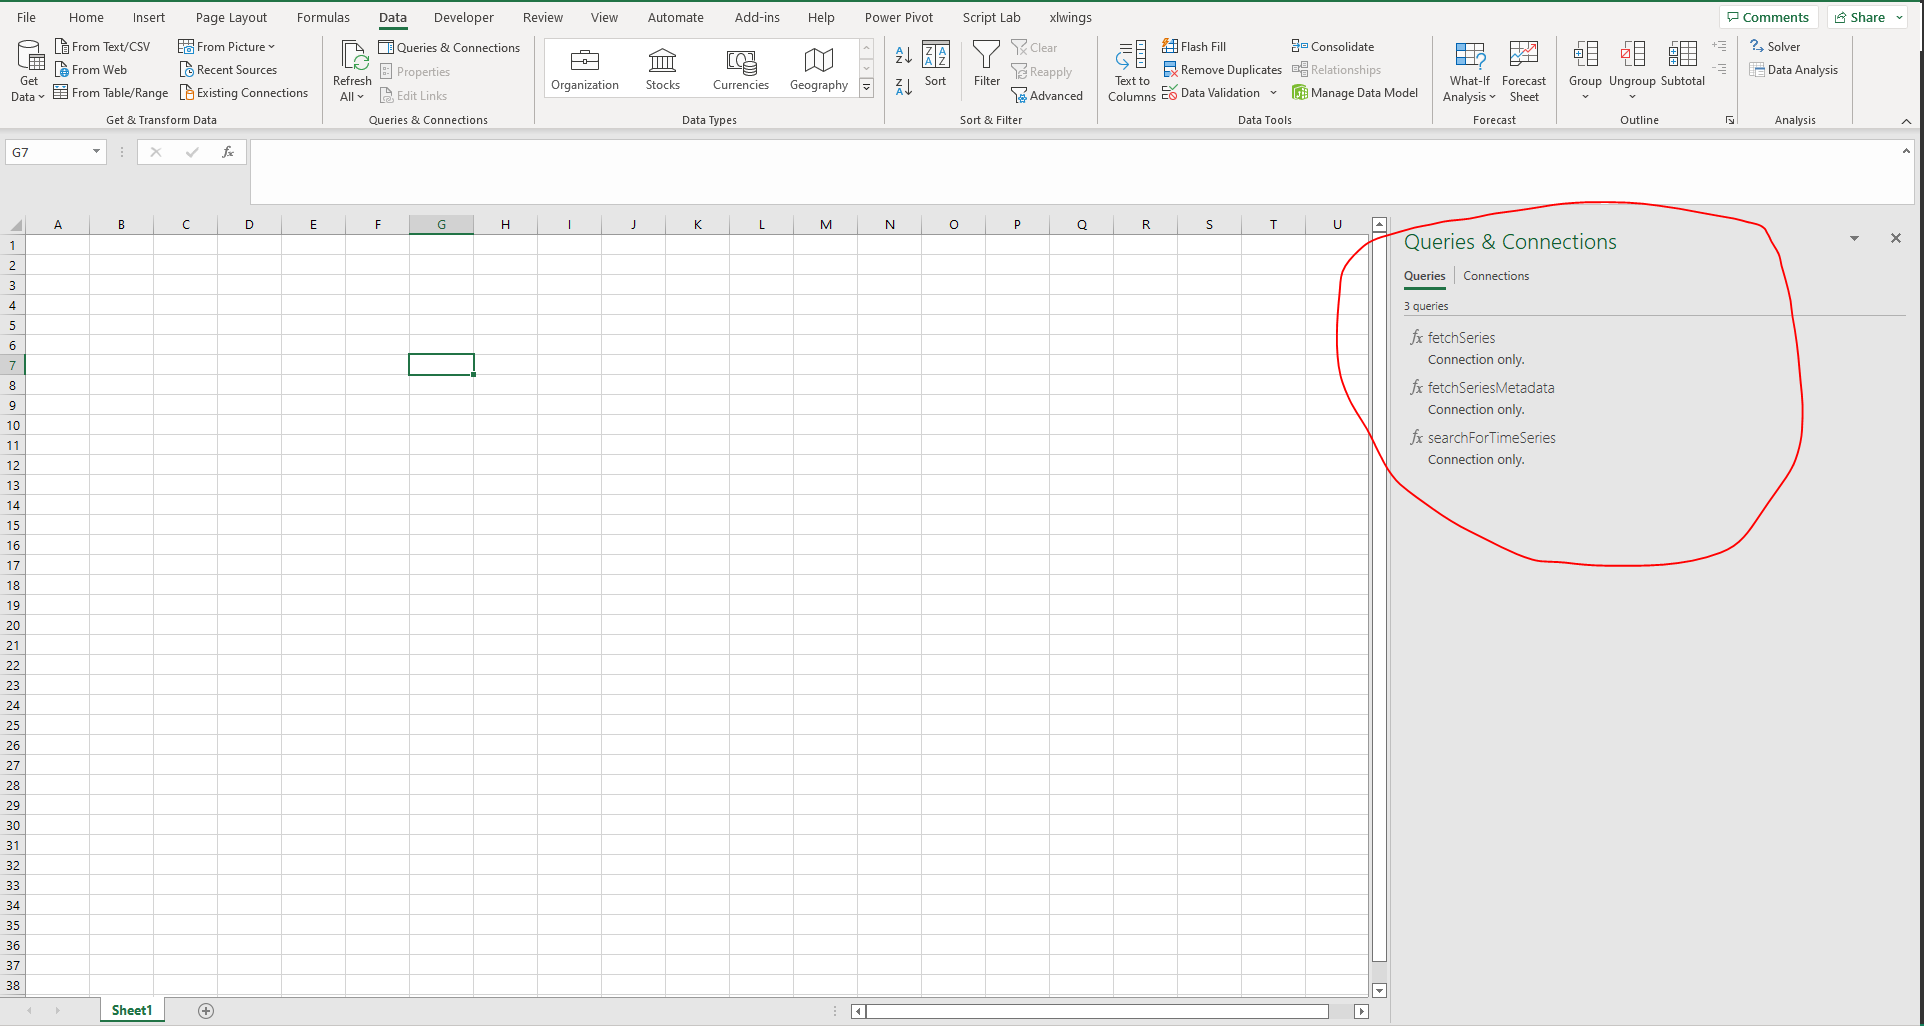
You should now see the four Power Query functions in the right pane. You are now set to download data.
Data privacy settings
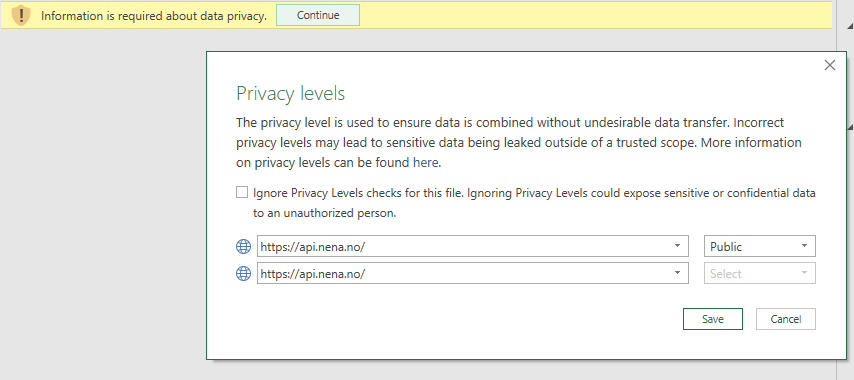
The first time you try to fetch data from the Power Query functions you may see the following message:

You need to set the data privacy permissions for the workbook.
Press Continue.
In the following window, set your desired privacy settings. We recommend Public or Organizational. Private will likely not work due to firewall. You can also choose to ignore data privacy levels for the workbook. After choosing your level, press save. Your query should now work. If not, try to Refresh the query.
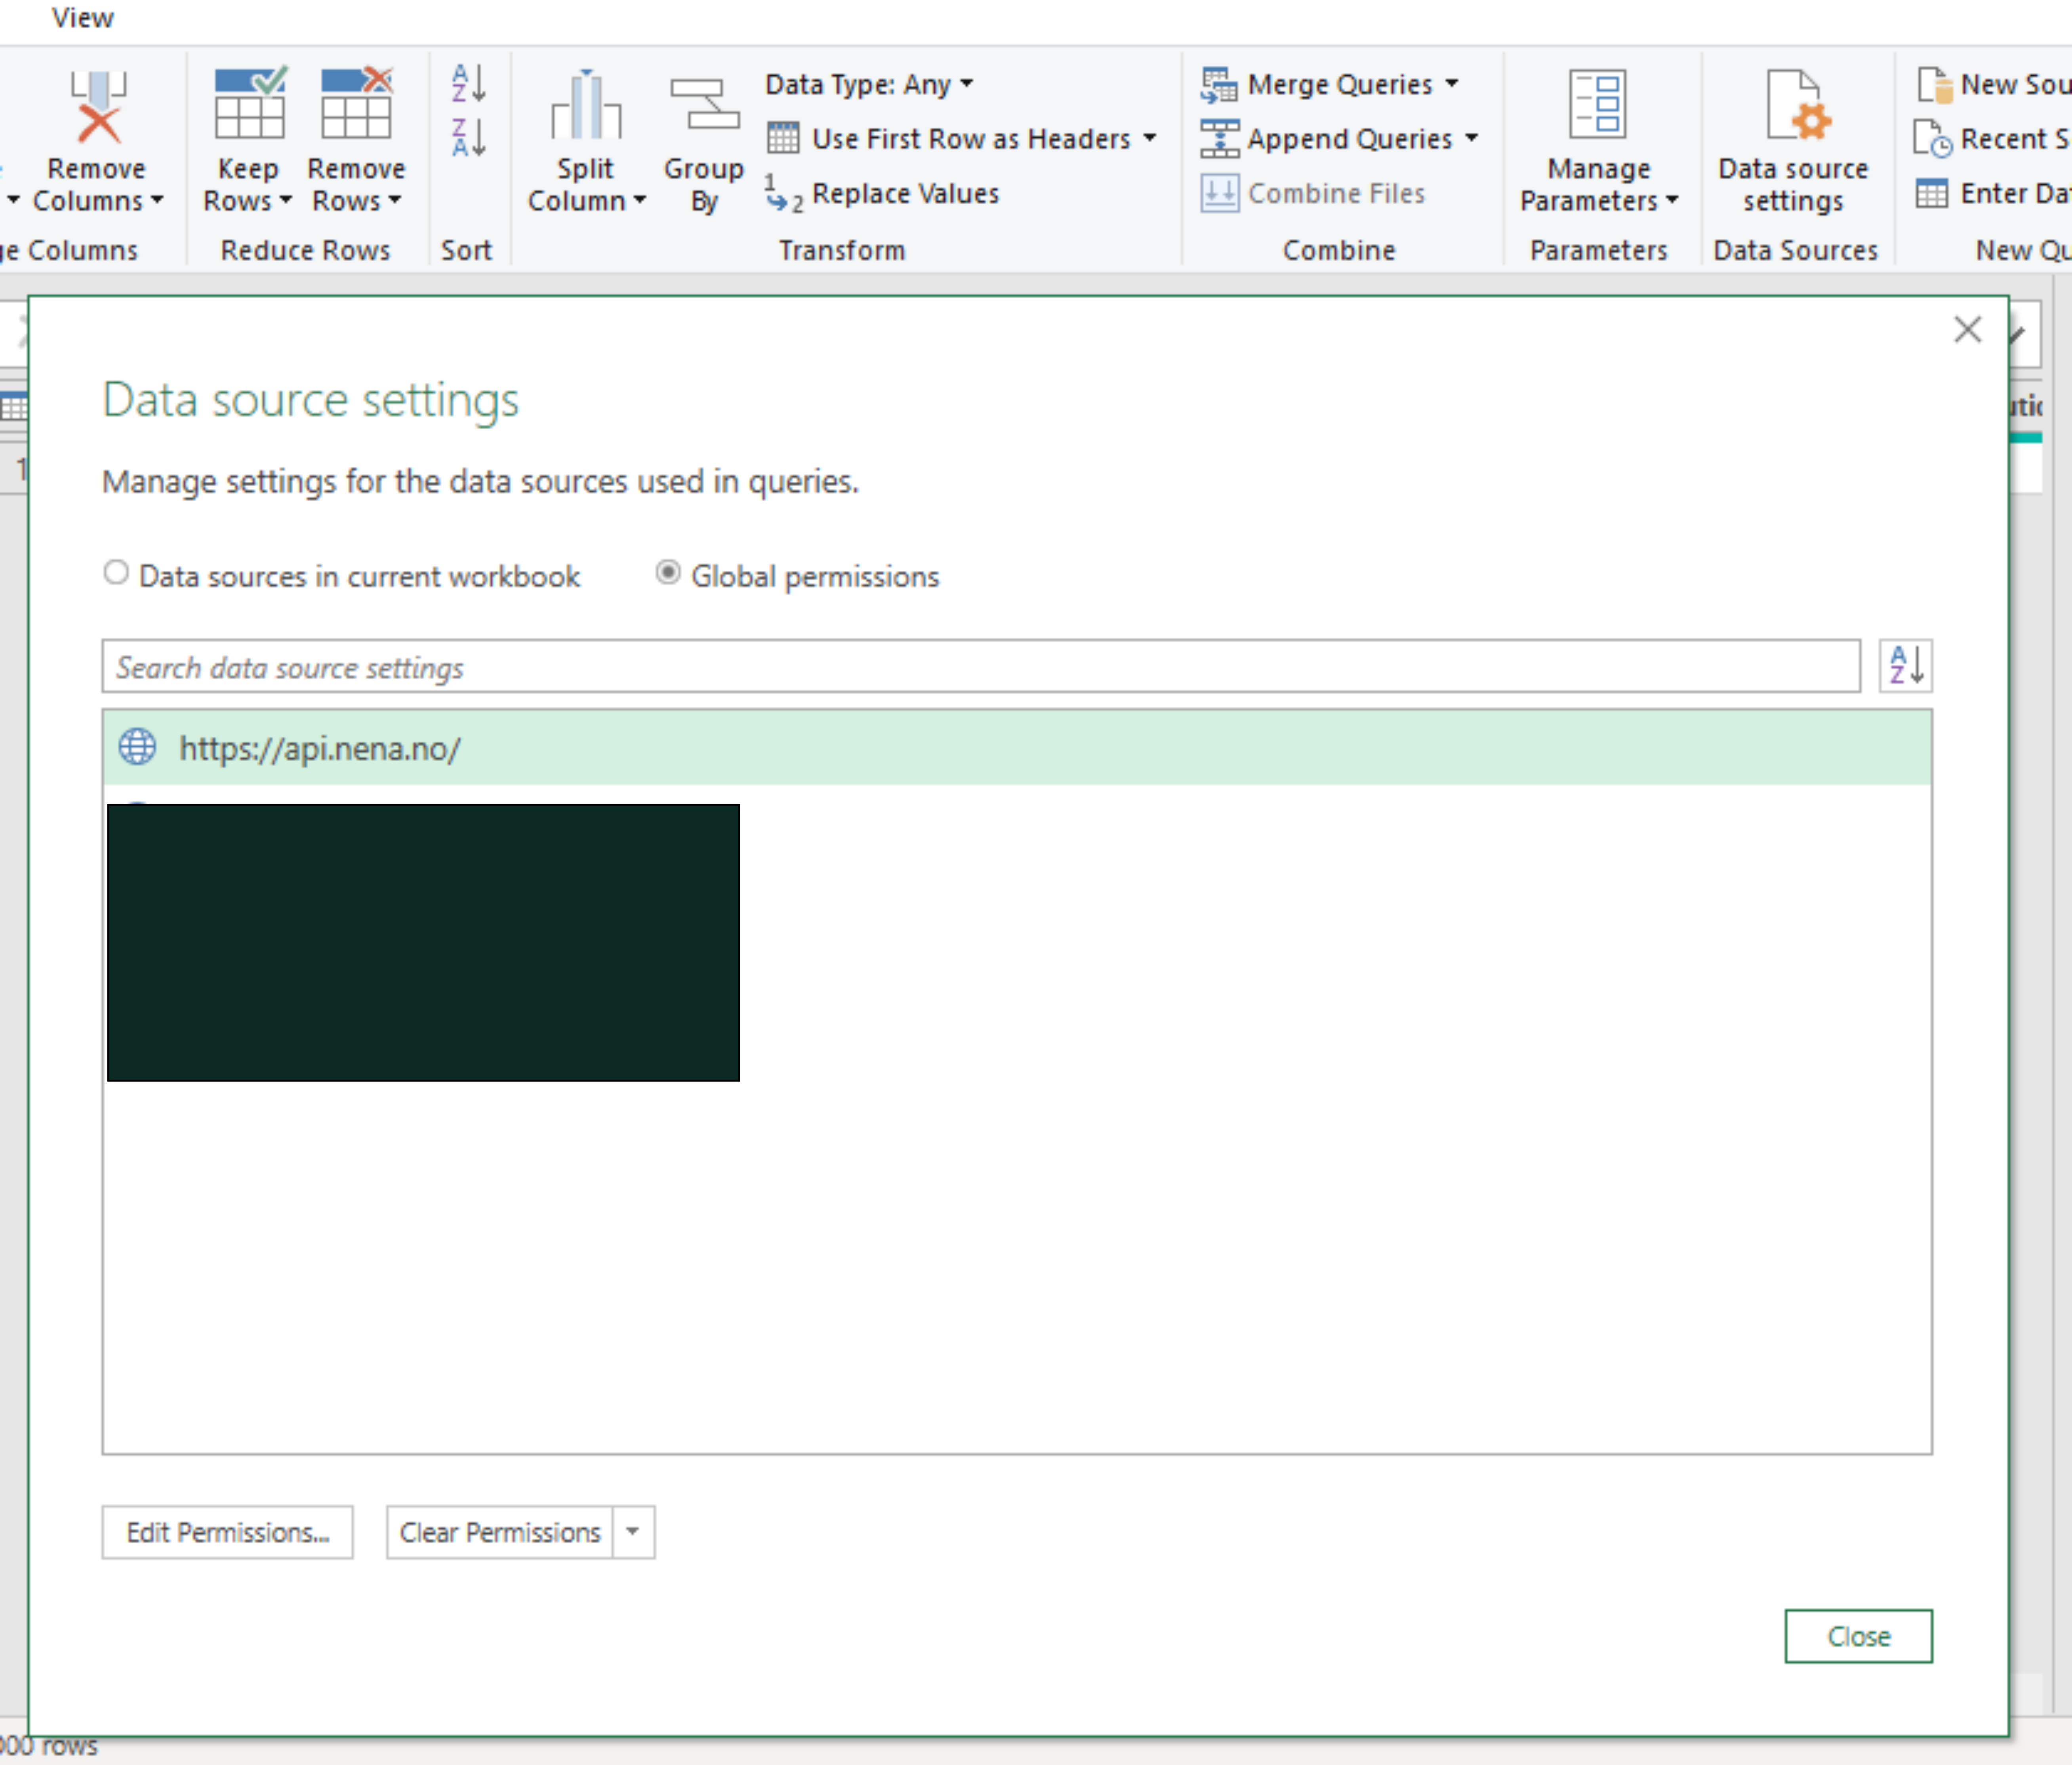
You can change the data privacy settings by:
Going to “Data source settings”, choose “Global Permissions”.
Select “https://api.nena.no” and click on either “Edit Permissions” or “Clear Permissions”
Installations in future workbooks
To add a Nena API Power Query connection in future Excel workbooks you don’t need to repeat the whole process detailed above.
In a new workbook go to the “Data” tab and click on “Existing Connections”.
Here you will see a list of the three Power Query scripts. Simply open each one and choose the option “Only Create Connection”.
It is also possible to copy and paste the queries from the “Queries & Connections” pane into another workbook. Simply right-click the function and choose “copy”, go to the other workbook’s Queries pane, right-click and choose “paste”.
Optional Excel configuration
If you don’t want to type your Nena username or password every time you use the Power Querie scripts, you can configure named ranges in an Excel sheet with your username and password.
Create a new sheet in the Excel workbook and name it preferably “Nena Config.” or something similar.
In the newly created sheet type your Nena username and password into any two cells.
Click on the cell with your username and go to the “Formulas” tab and click on “Define Name”.
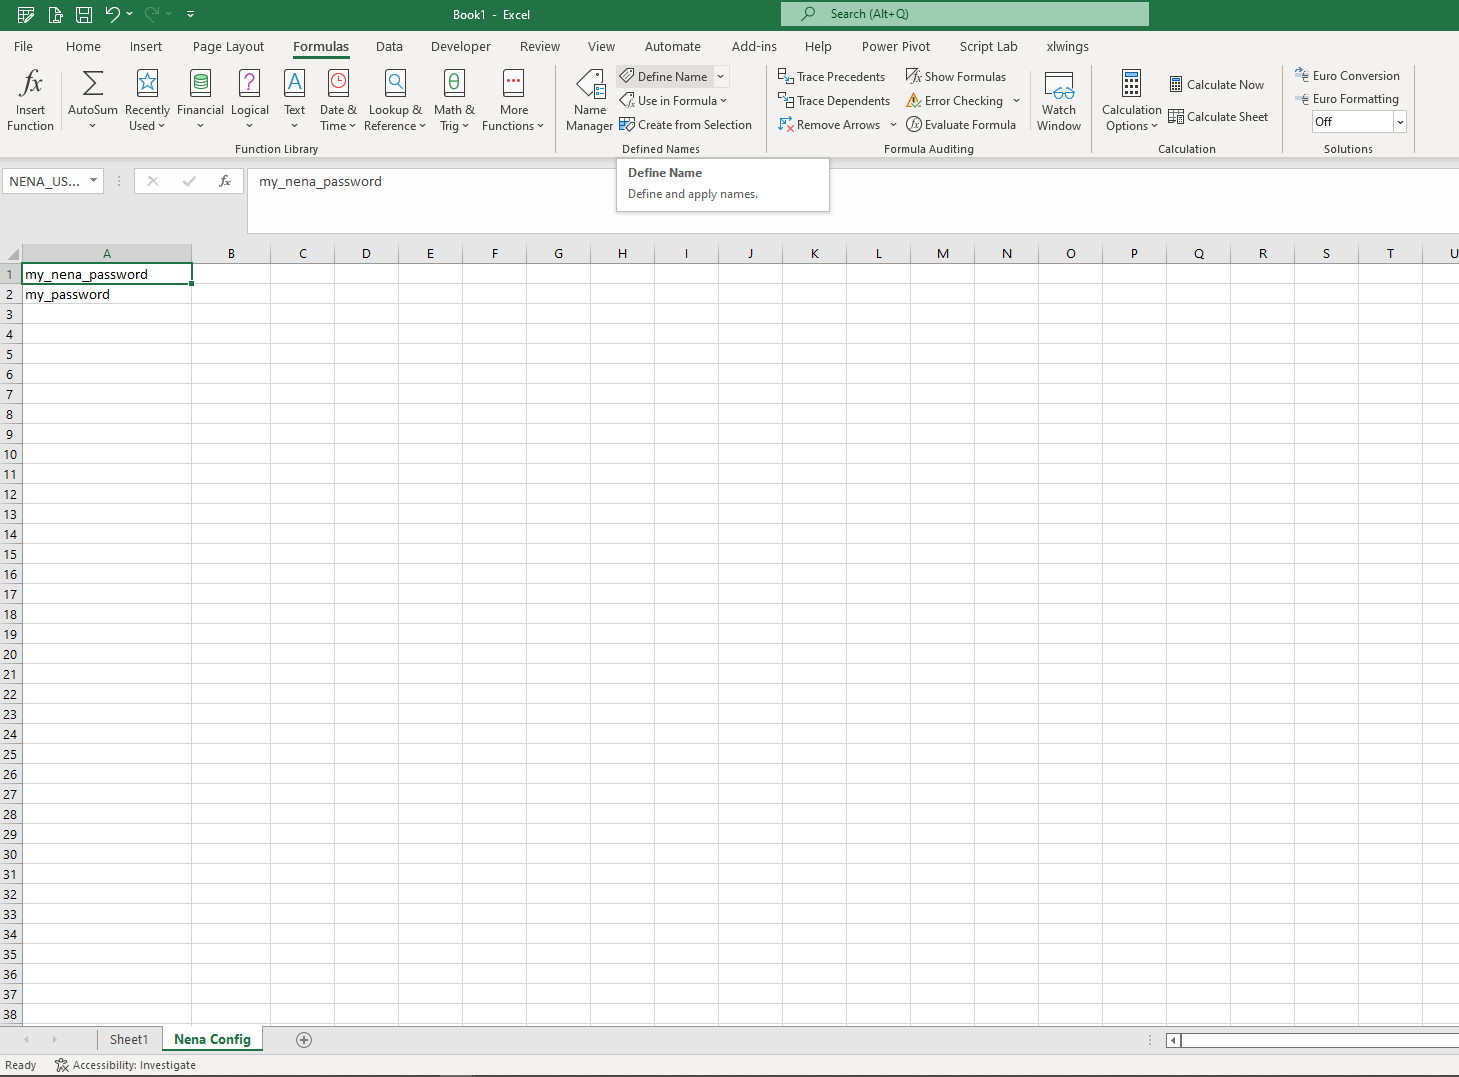
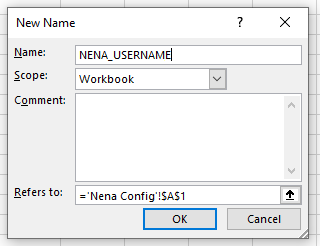
In the New Name dialogue box, in the “Name” field, replace your username with the word “NENA_USERNAME”. Note that this should be written exactly like stated i.e. all captial letters and underscore. Click “OK”.
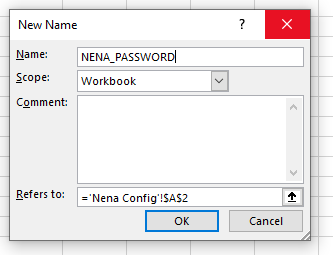
Now repeat the same process with the cell containing your Nena password. In the “Name” field write “NENA_PASSWORD”. Click “OK”.
If you open the “Name Manager” in the toolbar menu you should now have two named ranges called “NENA_USERNAME” and “NENA_PASSWORD”. If you see these, you are done and can skip typing your nena username and password in the Power Querie function.

Power BI
For Power BI we have made a custom connector making the installation process simple. It involves copying the .mez (connector) file to your “Power BI Desktop”/”Custom Connectors”-folder. After this, you can load all Power Query functions using the Get-Data navigator.
Copy the .mez file called “StormGeoNenaConnector.mez” found in the “Nena Power Query”/”PowerBI” folder.
Paste the file into “Documents”/”Power BI Desktop”/”Custom Connectors” in your user’s documents folder. If you do not see such a folder, simply create the folder.
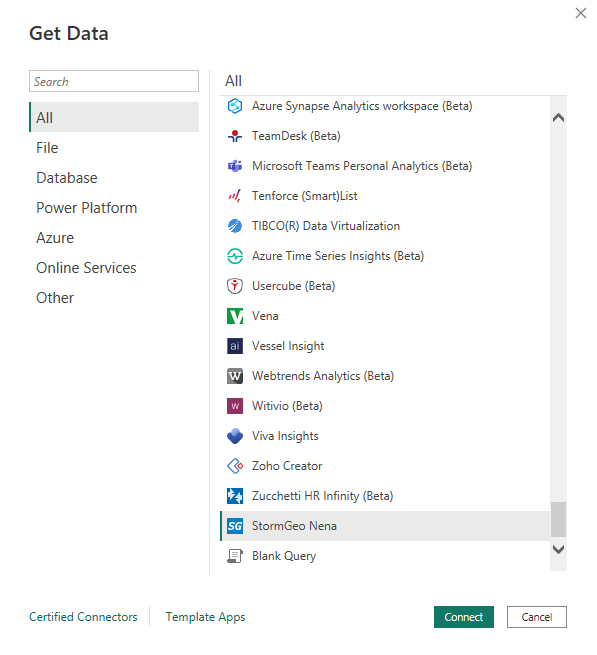
Open Power BI Desktop and click on “Get-Data”. From the “Get-Data” navigator either search for “StormGeo Nena” or go to “Other” and scroll down until you find the connector. If you do not see the connector, it means that you have not placed the .mez file in the correct “Power BI Desktop”-folder.
Power BI desktop security settings
It may be that your Power BI desktop application is not configured to allow custom connectors from non-windows certified connectors. In this case, for the StormGeo Nena connector to be allowed by Power BI you will need to change your secutiry settings to allow third-party extensions. Please find instructions on how to do so by visiting:
Refresh of published Power BI reports
If you are publishing Power BI reports in the cloud and want to activate automatic refresh you will need to add the StomGeo Nena connector to a On-premise data gateway. Instructions on how to do so can be found via:
https://learn.microsoft.com/en-us/power-bi/connect-data/service-gateway-custom-connectors
User Guide
Excel
Here is outlined how to use the provided NenaAPI Power Query functions. The guide will teach you how to find series ids, retrieve and load metadata and the actual time series into Excel. If you see a warning notice on data privacy when trying to use any of the querie-functions, then configure these as specified here
Searching for series
It is convenient to have a list of the series codes most relevant to you as an Excel tabel in your workbook. That way, you can quickly find a series ids to load using the “fetchSeries” and “fetchSeriesMetadata” queries. We use the “searchForTimeSeries” query to retrieve a list of series ids based on a prefix search. If you are new to Power Query, it is strongly advised that you read the Power Query documentation before proceeding, as this guide assumes you are familiar with Power Query.
Tip
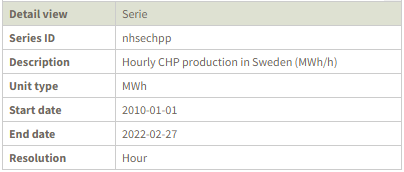
All time series ids can be found on the Nena portal’s fundamentals data. Selecting a series will bring up an information box in the bottom left of the page. This is an alternative to the “searchForTimeSeries” query method.
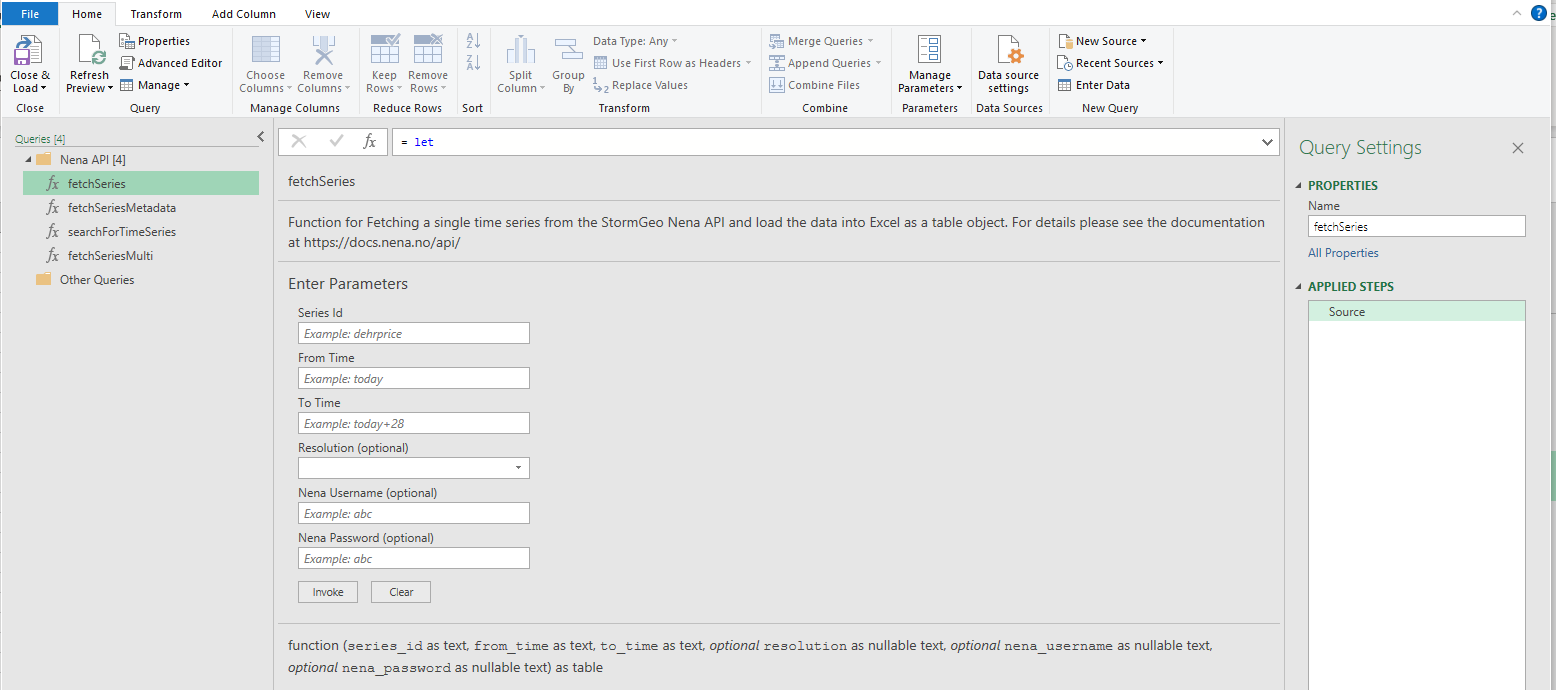
Double click on the “searchForTimeSeries”-function in the Queries & Connection pane in Excel. In the prefix field you can type a string representing a prefix for the series id. Most time series are categorized by prefix-identifiers. For example, by writing “nap” as a prefix, the querie will return all time series related to the Nordic Area Price model.
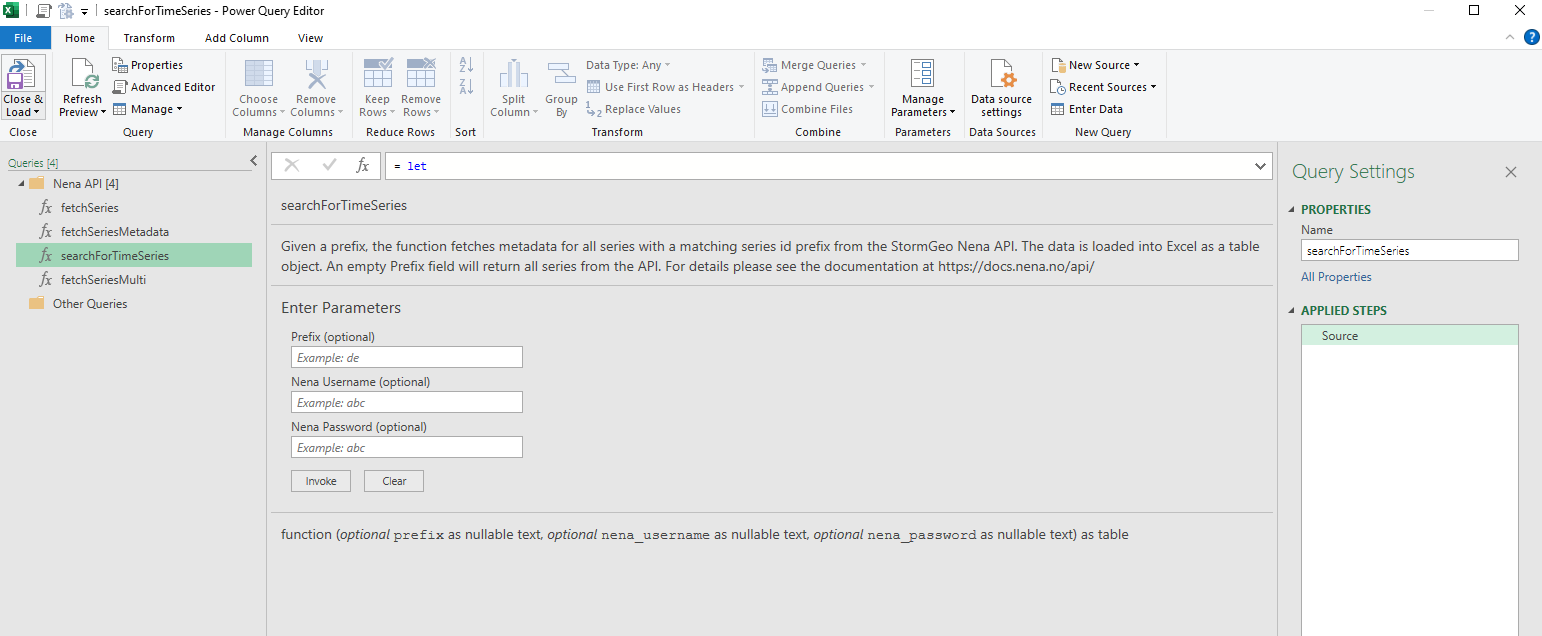
In the prefix field type “nap”. If you don’t have access to Nordic Power, you can type a country code as prefix that you do have a subscription for e.g. “de” or “uk”. If you have defined you Nena username and password as named ranges in a separate sheet you don’t need to provide these as parameters. Click “OK” and the Power Query Editior will open.
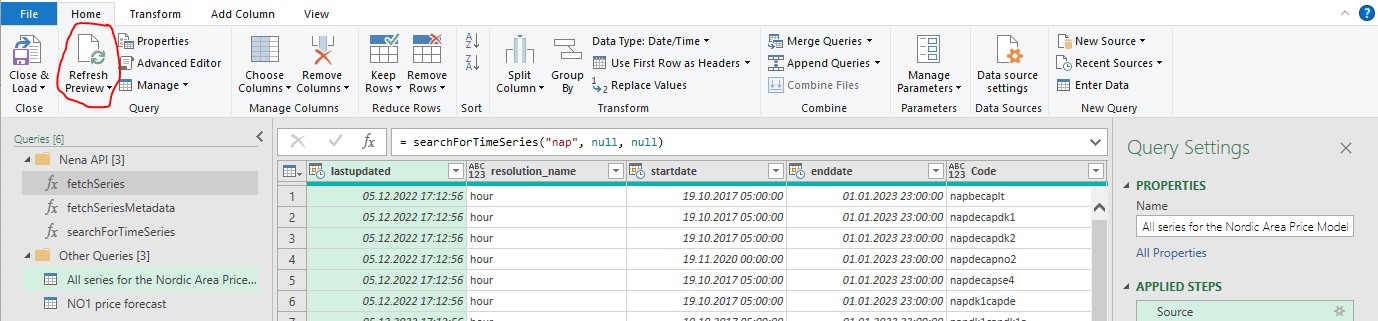
In the Power Query Editor you will see a preview of the data. If you wish you can manipulate the data into whatever format you prefer. Rename the query by right-clicking the new query in the left pane to “All series for the Nordic Area Price Model”. Click on “Close and Load” to load the data to a new excel sheet.
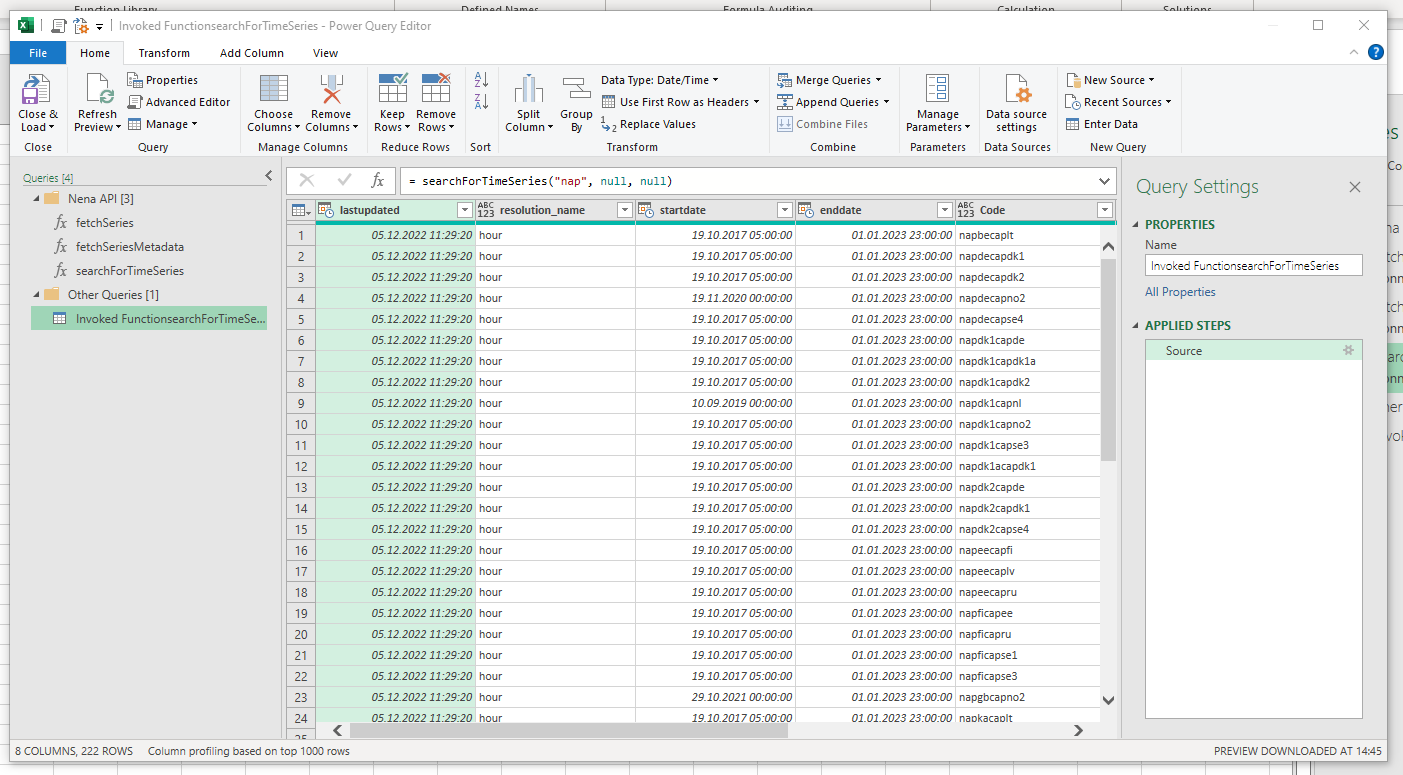
You should now see a table with information on series related to the Nordic Area Price model. You can filter the table to find specific data series. Try clicking the drop-down arrow on the column “Description” and write “Flow”, to filter data series only related modelled interconnector flows. You can be more specific in your filtering by using the “text filters” option.
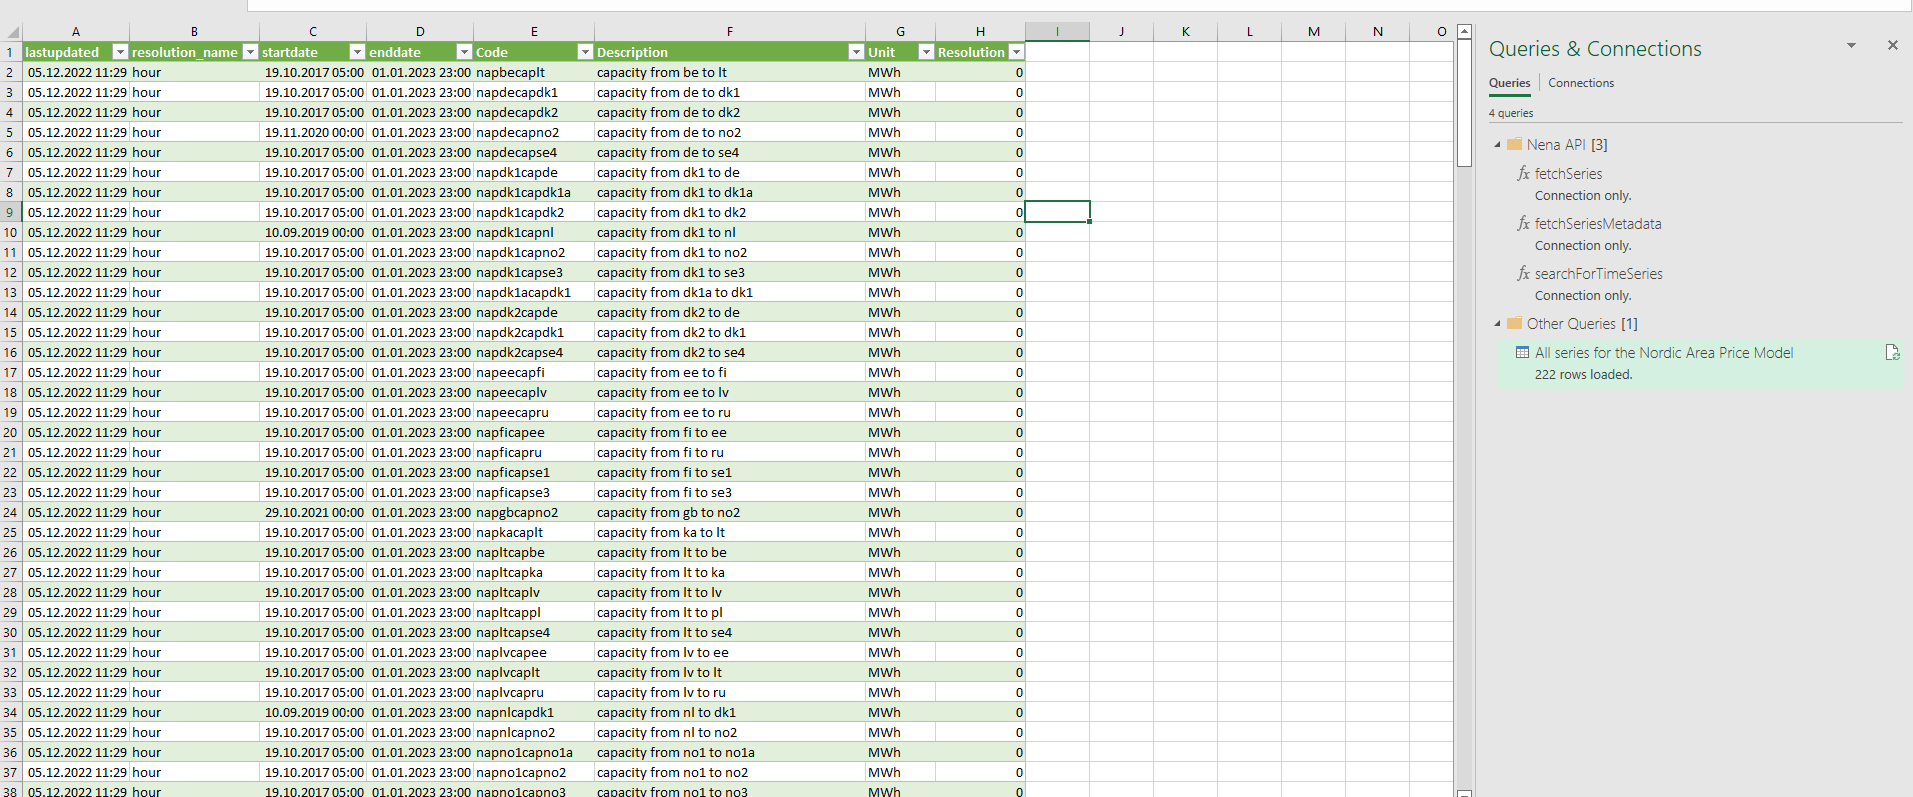
In the tabel you just loaded, you can see information on when the data series was last updated (i.e. Nena’s last prognosis), a description of each series, the series id which you will need to download the actual data, and time series unit. You can refresh the query by clicking on the “Refresh”-icon on the query tabel in the right pane. This will fetch the latest data from the API.

Fetching series data
We will now use the tabel we just retrieved to fetch specific series data from the Nena API. For this you can use both the “fetchSeries” or “fetchSeriesMulti” functions. The multi function allows you to fetch several series in one function call. It also gives you the option to return the table in either wide or long format. Long format data is convenient for pivot tables and should generally be used in Power BI or with Excel’s Pivot Table tool.
Create a new Excel sheet and name it “NAPM”
In the newly created sheet, double-click on the Power Query function called “fetchSeries”.
As series_id write “napno1pri”, in the from_time field write “today”, in the to_time field write “today+30”. As resolution write “hr” for hourly resolution. Again, you don’t need to type you username and password if you have defined them as named ranges. Click “OK” to open the Power Query Editor.
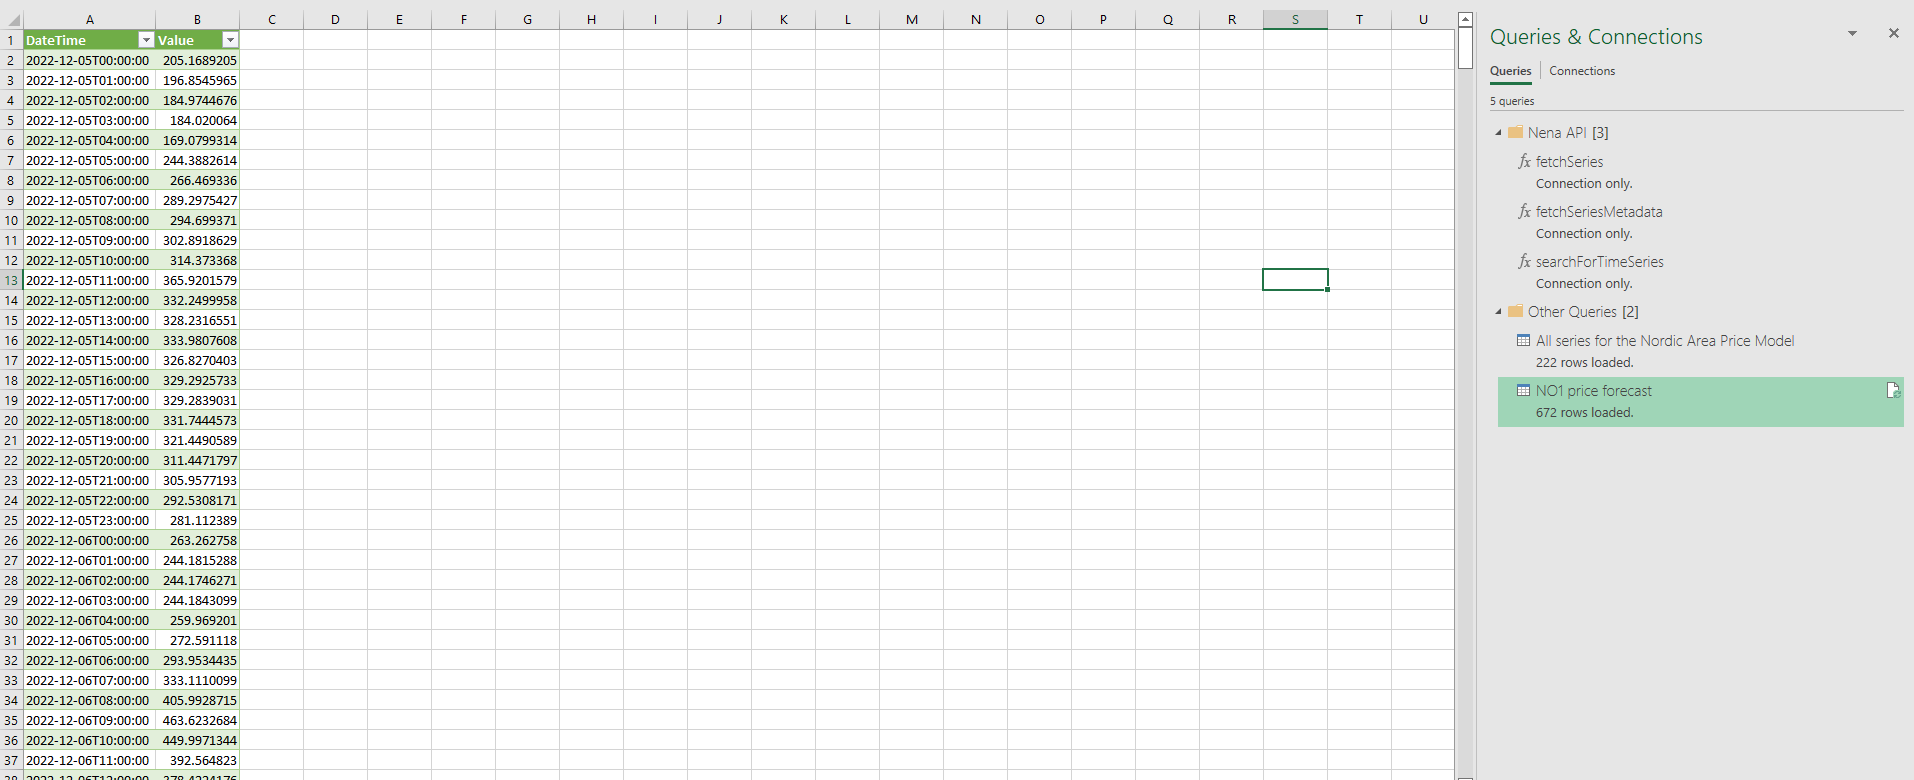
Rename the query tabel to “NO1 price forecast”. Click on “Close and Load To..””, select “Existing Workbook” and click on a cell in the sheet where you want the tabel. Click “OK”.
You should now have a tabel with the price forecast for NO1. You can repeat this process with additional areas. Try loading an interconnector capacity series, the price in SE3, and the consumption in NO2. Use the tabel with all the series ids to find the series you need.
Tip
There are many convenience keywords you can use when fetching data from the API. This allows you to fetch dynamic data using for instance relative datetime keywords e.g. today, or eoy (end of year). You can also have the API resample the data from hourly to daily, weekly, etc, resolution. For a full list of keywords, visit the “Access data” page. As an example, using the resolution “offpeak” we can extract the off-peak prices from beginning of last month to the start of the month.
Power BI
The Power Query functions works exactly the same as they do in Excel. See above on how to use the Query functions. Here is shown how to load the functions from the connector into Power Query.
The first time you connect to the StormGeo Nena connector, a login prompt will be shown. Here you type your Nena username and password. You only need to do this once.
Tip
If you accidentaly typed the wrong login credentials, you can easily clear these and try again.
In Power BI, go to “File”/”Options and settings” and click on “Data source settings”.
Click on the “StormGeoNenaConnector” and select “Edit Permissions..”
Under “Credentials” click on “Edit”.
Now type your Nena username and password and click “Save”
Once you connect to the StormGeo Nena connector, check the functions you want to load into your project.
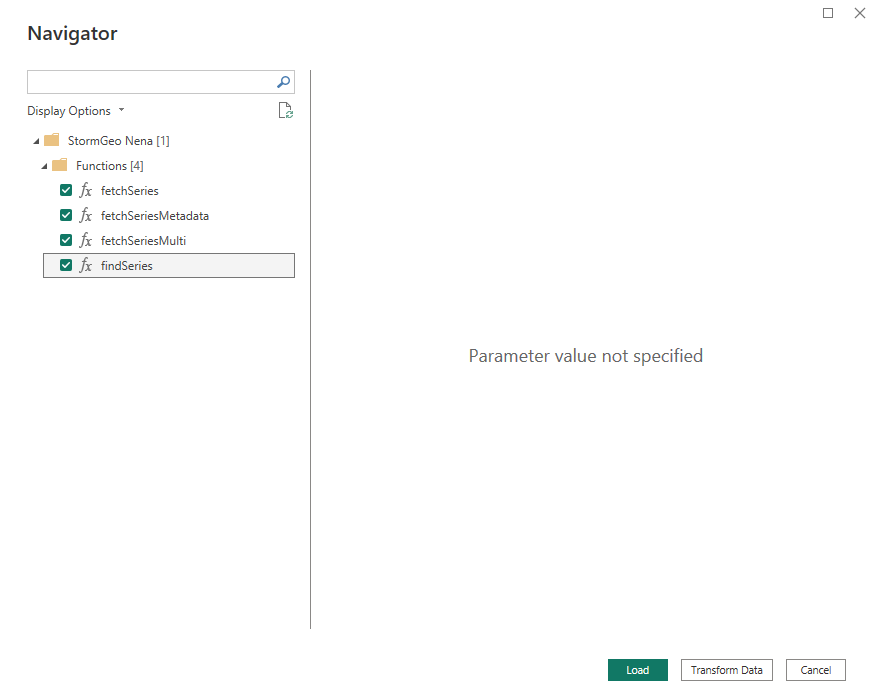
Click on “Load” or “Transform Data”. The latter option will also open the Power Query Editor.
Your chosen Power Query functions are now loaded into Power Query in Power BI. To use them open the Power Query Editor (Click on “Transform Data” from the “Home” menu).
If you want to load additional functions, connect to the StormGeo Nena connector and load any function form there.
Common errors
If you are experiencing errors it is a good idea to read the error message returned by Power Query. Here are a few common problems and how to solve them.
Refreshing a query
If you are having trouble, try refreshing the query. If this does not resolve your problem, see below.
Missing username and/or password
You have not provided a username or password. This means that the nena_username and nena_password fields in the function are empty or that you have not defined the credentials as Excel named ranges.

Incorrect username and/or password
Power Query tells you that your username or password is incorrect or you do not have access to the NenaAPI. Check you username and password.

Invalid parameter
This error message means that you have provided a parameter keyword that is not correct or is invalid for the time series. In this example, the series id is incorrect. It is also possible that you have set a resolution keyword that the series does not support.
